Blah ceiling fan getting you down? Refashion it with fabric!
You will need:
about 1 yard of fabric, enough to cover the surface of your fan blades
same amount of Heat and Bond Craft Bond, the extra heavy duty stuff
Pencil, Scissors, Sharpie, Iron, Screwdriver, Awl
Time to Complete:
about 1 hour, including time spent looking for the screwdriver and retrieving dropped screws from under the bed
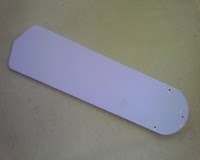
1. Turn the ceiling fan off and remove the fan blades. Remove the arm from each fan blade.
NOTE – Keep all of the screws from the fan blades in a safe place, like a bowl, preferably one that has a lid. It is extremely annoying when the darn things grow legs and wander away some time during the refashioning process.
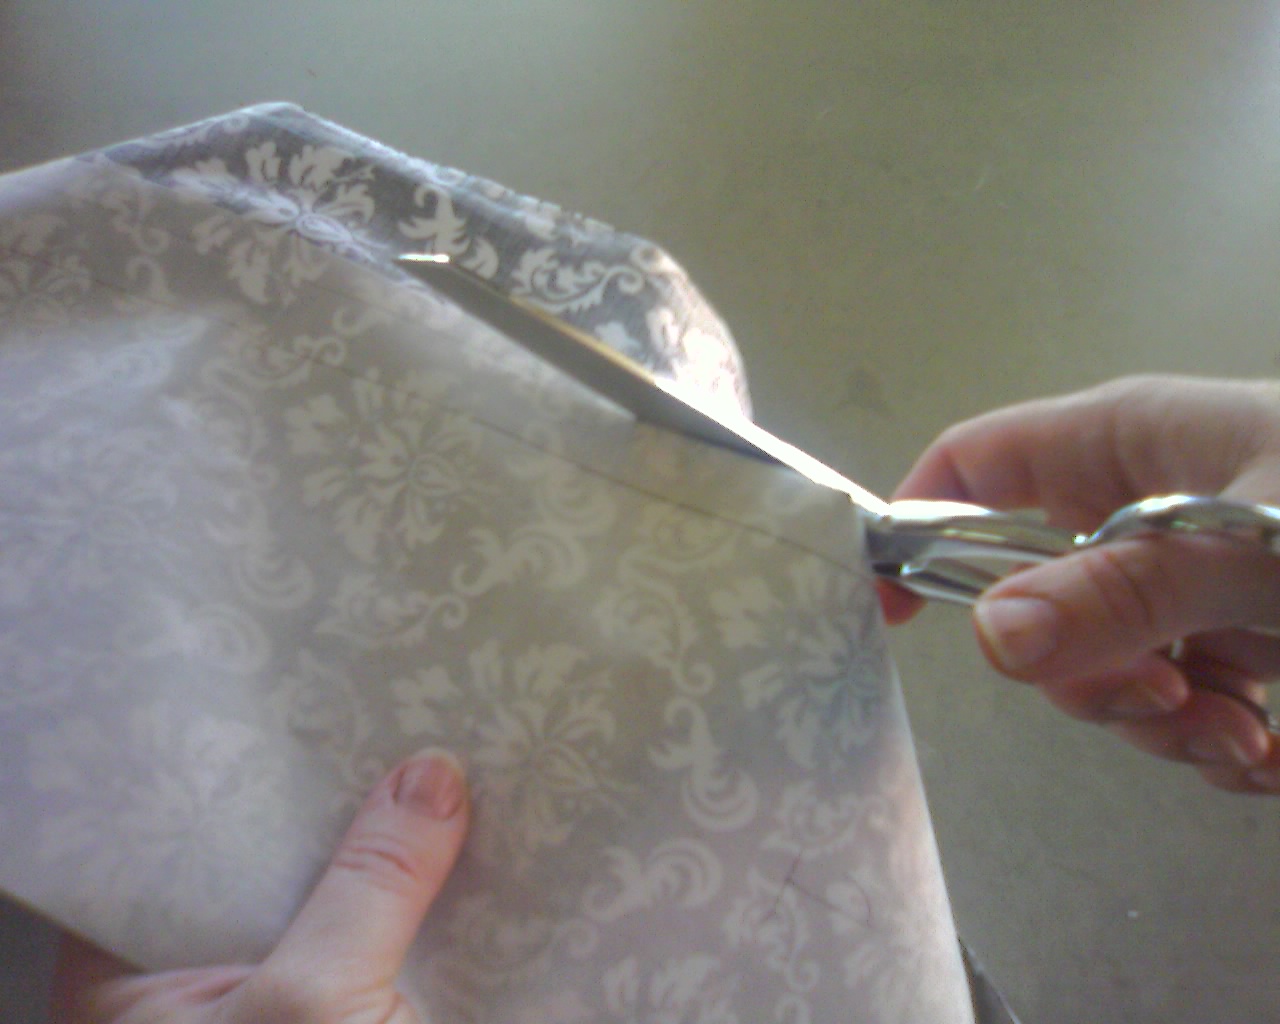
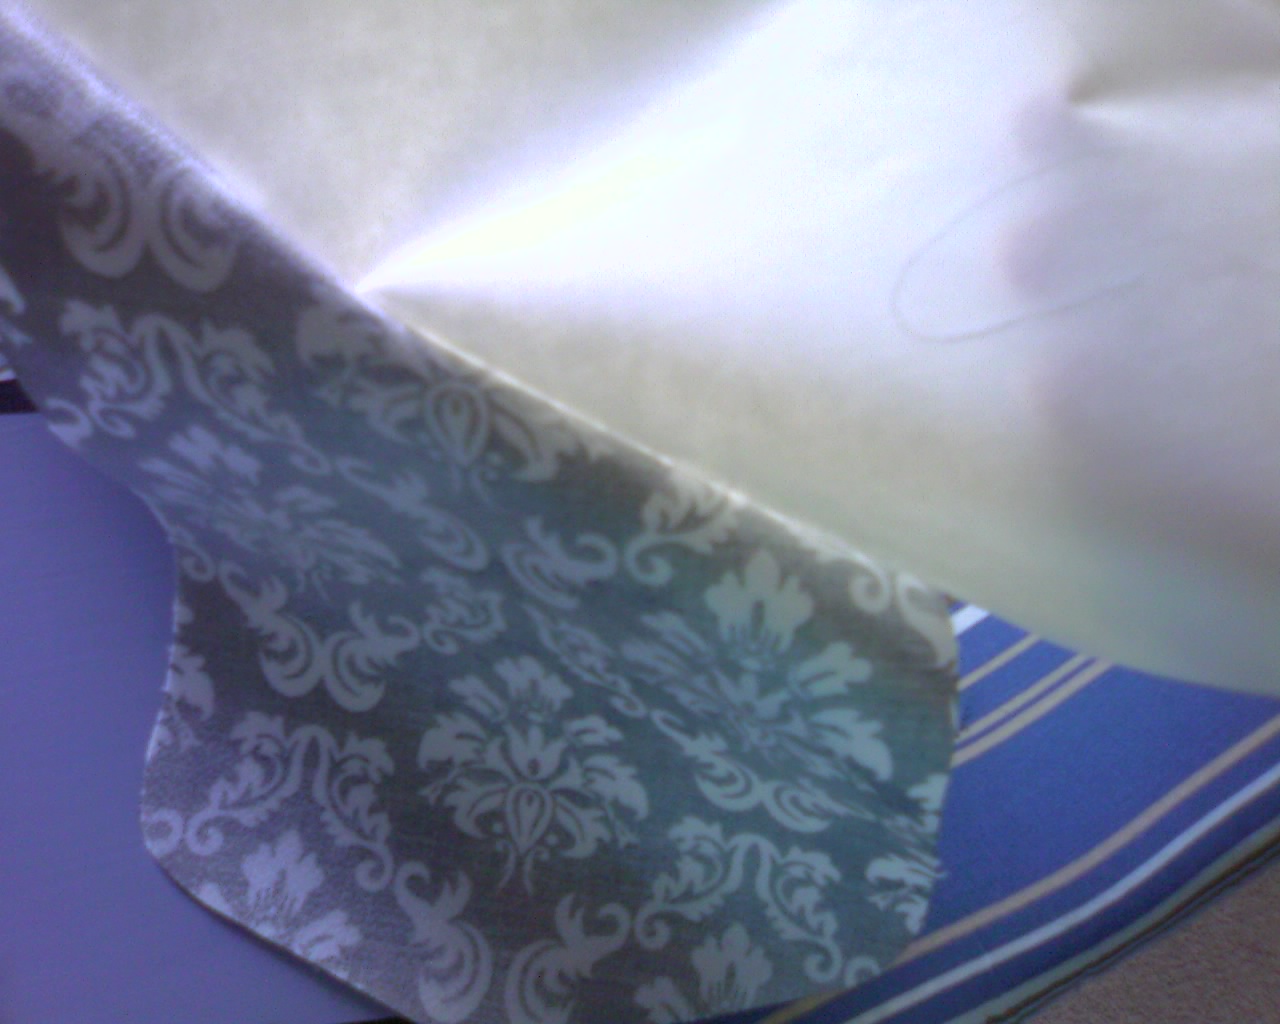
2. Trace around each blade, marking the paper side of your heat and bond. Number each piece, and write a matching number on the fan blade. Yeah, yeah, they should be exactly the same size, but alas, each one will be just a little off from its neighbor. Cut the shapes apart, leaving about a 1/2″ edge outside your pencil line. You’ll trim them later.
3. With a sharpie marker, color the edges of the fan blades in a complementary color to your fabric. Color over the edge about 1/4″ as well; this will camouflauge any squiggly trimming of your fabric.

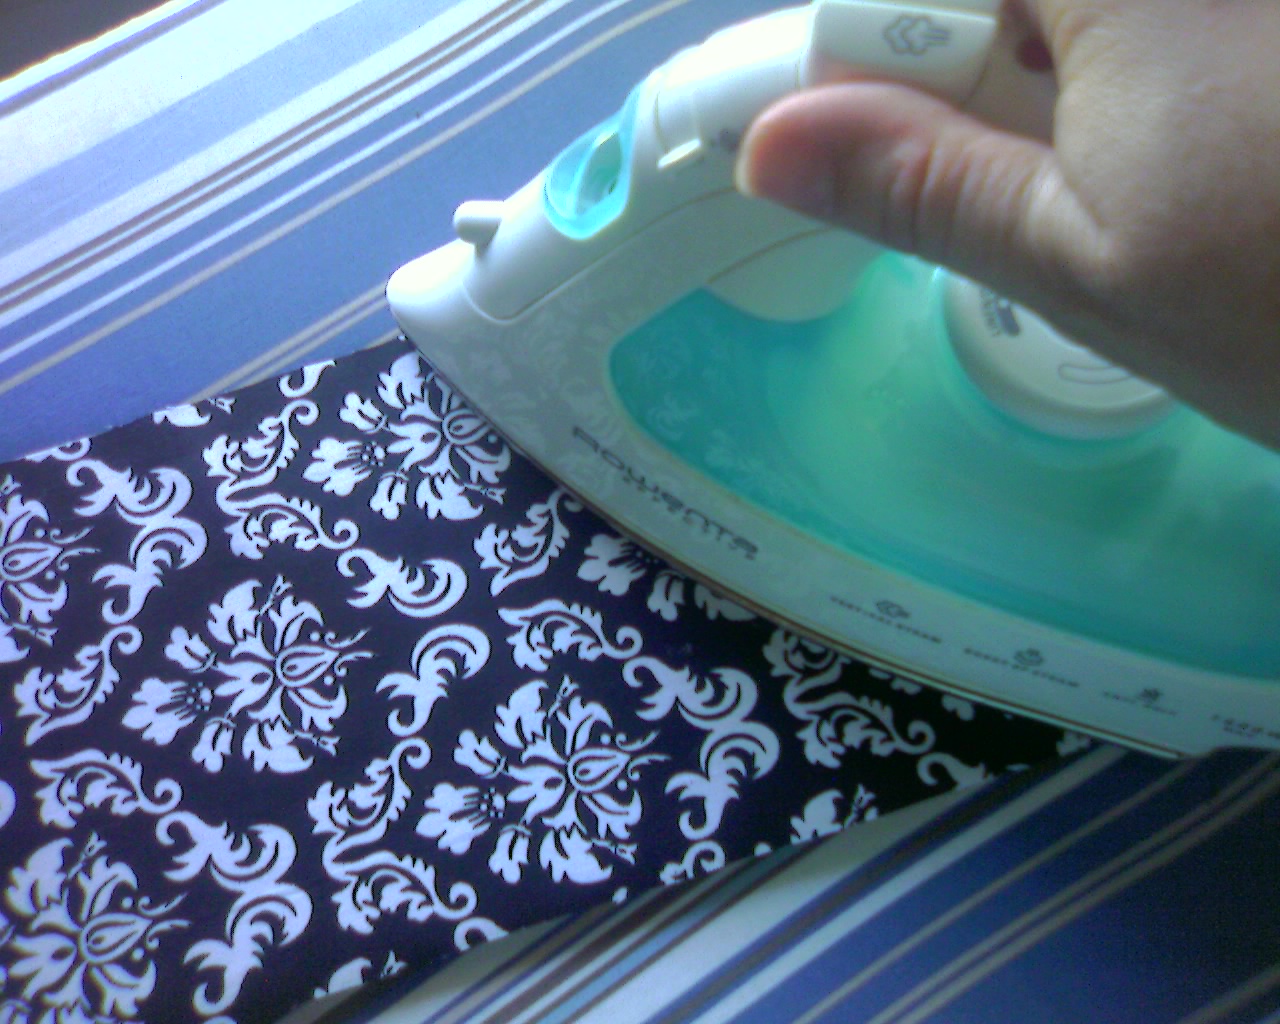
4. Following the manufacturers’ instructions, fuse the Heat and Bond to the wrong side of your fabric.
ANOTHER NOTE – Pay attention to the pattern on your fabric! Make sure that you line up the Heat and Bond shape on the same repeat of the pattern, so that all of the blades look the same when you are finished.
5. Trim the bonded fabric to the final fan blade shape. Remove paper backing from the first piece, and iron on to the corresponding fan blade. Repeat for all blades.
6. Open holes through the fabric with the awl at each existing hole in the fan blade – this will make it easier to put the screws back in.
7. Reassemble the fan blades, attaching the arms, and then reattach to the fan base.


What a great idea!
Thank you for these instructions. What a good idea for a sewing room ceiling fan!!
I absolutely love the concept, and the fan is beautiful against the white ceiling. I do have one question, short of covering the fabric with Iron-on vinyl, how does one successfully clean the blades?Hugs,Paula
Hi Paula!I vaccuum the fabric side, and wipe the top side with a damp cloth when needed. My plan is to simply replace the fabric when it becomes so grungy that Teen Daughter #2 can't stand it any more! To remove: run a warm iron over the fabric to soften the bond and peel it off the fan blade.Angela P.
What a great idea and wonderful *how to*! Thank you so much for making this and sharing it with us… (Now to go and look for some fabric of my own… Yea!!)
that's really awesome! such a great idea! you could make over any fan! Fabulous!
Wow! I'm a new SAHM and found this linked on OhDeeDoh. I don't do a lot of DIY stuff because I can't sew… but I could handle this one! Thanks so much!
Thanks for the idea!! You are so creative!! I got a new ceiling fan from Ace Hardware for my living room!!
Variety is the spice of life. ———————————–